• Home
  • ABOUT
  • Recipes
  • Beauty
  • Fitness
  • Fashion
  • Mom Life
  • Shop
  • Contact

Jeni From The Blog

By Jeni Deana

Recipes

Almond Flour Banana Muffins

June 11, 2020

If you are looking for a healthier version of muffins, you’ve came to the right place. Lately, I’ve been exploring tons of recipes using flour substitutes like; Almond Flour and Tapioca Flour. These are considered Paleo and/or Gluten-Free. If you are not familiar with these “trending” nutritional or dietary terms here’s a quick overview:

Paleo:

  • Foods obtained from hunting and gathering.
  • Unprocessed food
  • Includes lean meats, fish, fruits, vegetables, nuts and seeds.

Gluten-Free:

  • Found in wheat, barley and rye.
  • Common diet for those with Celiac Disease or those with gluten sensitivity. 

Although, our family does not have any food allergies or dietary restrictions that I know of, I’ve chosen to swap out white flour for an unprocessed alternative. As a Mommy, I try to make sure the least amount of chemicals are going into my little one’s belly. It’s comforting to know I don’t have to deprive my son of sweet treats, but that I can prepare a healthy yet tasty version of them. I hope you can share this with your family as well!

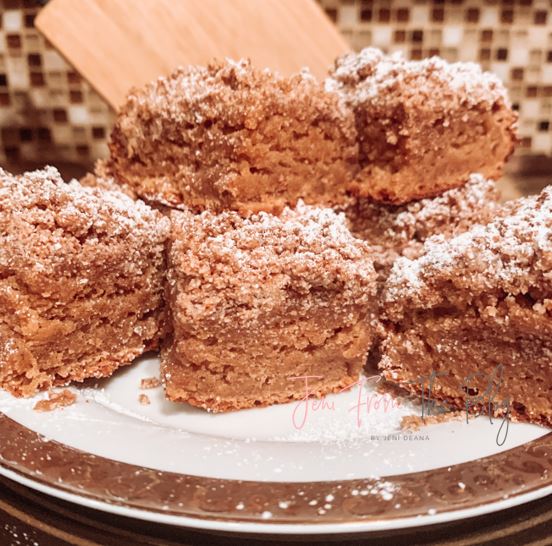
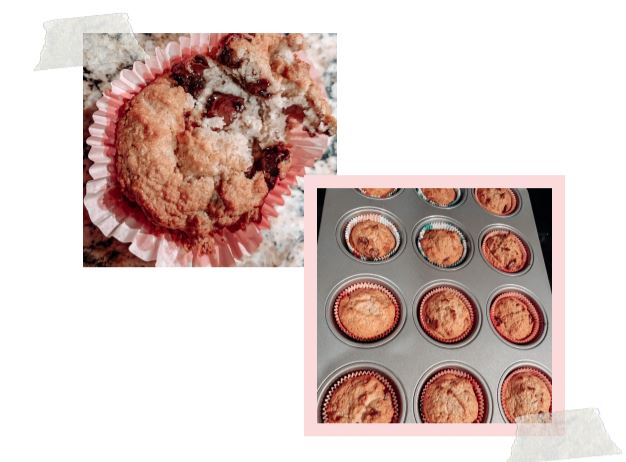
Just about everyone has made Banana Bread during the Quarantine. If you haven’t personally, I’m sure you know somebody who has. Not sure if it was the stocking up of bananas or sheer boredom that inspired so many of us to become “Banana Bread Bakers”. If you’ve seen my earlier post, I shared our family favorite, Banana Bread Coffee Crumb Cake. I must have made about 7 batches. I decided to switch it up, leading me to this simple muffin recipe. It’s easy and great on the go especially with a toddler. So without further ado, here’s my Almond Flour Banana Muffins.

Ingredients

  • 3 Ripe Bananas (the browner the better)
  • 3 Large Eggs
  • 1 tsp Ground Cinnanmon 
  • 1 tsp Pure Vanilla Extract
  • 1 tsp Baking Soda
  • 1/2 tsp Baking Powder
  • 1/4 tsp Salt (I use Himalyan)
  • 3 Cups Almond Flour
  • 1/2 Cup Blueberries, Nuts, Dark Chocolate or Semi-Sweet Chocolate Chips.

Prep-Time: 10 mins

Cook Time: 30 mins

Serving: 18 Muffins

Directions

  1. Preheat oven to 350 F.
  2. Grease inside of liners or tray with coconut oil or spray.
  3. Combine bananas, eggs, vanilla, cinnamon, baking soda & powder and salt until smooth (using mixer, blender, food processor or by hand).
  4. Add Almond flour and mix until combined.
  5. Add chocolate chips, blueberries or nuts and combine (if adding blueberries use spatula or spoon to avoid breakage).
  6. Pour into baking tray. Bake for 30 minutes or until golden brown. Test with toothpick or fork, should come out clean. Let cool & enjoy!

Note: Chocolate Chips may not be considered Paleo unless specified. 

Calories: approx. 200 per muffin

Thank you for reading! Please drop a comment below. Your feedback truly helps!

With lots of love always xo Jeni Deana

Beauty

Let’s Kiss & Make-up This Summer

June 4, 2020

With everything weighing heavy on all our hearts lately, I wanted to lighten things up a bit. I don’t just mean with this glowy face primer.

We all want to put our best face forward this summer right? While we do that, it’s important we protect our skin. No matter what color your skin is, I cannot stress enough how important it is to apply SPF. If you don’t know me already, I’m all about health. While I generally focus on a healthy inside through my recipes and fitness routines, it’s just as important to protect the outside. That starts with your skin.

These are my favorite products to use for that natural summer glow. What’s great is this light-weight tinted moisturizer is combined with SPF already. I am not a beauty guru by any means, nor am I great at applying makeup. However, I have found that these products paired with a damp beauty blender or sponge work wonders! I cannot begin to tell you how many compliments I get and questions on what I’m wearing.

That’s what inspired me to share these amazing products with you. The photo above shows the sequence of my “go to” products #1 – 4, along with links to shop these items. It can’t get any easier than that!

For Reference These Are My Colors
#1- Backlight Priming Filter Face Primer (One Color)
#2- Sand
#3- Peach
#4- Fair Neautral

Hope you enjoy! If you’d like me to share more beauty posts, please do share your feedback in the comment section below!

Love always, jeni deana xo

Recipes

This C O F F E E Crumb Cake is Bananas!

April 30, 2020

(Gluten-Free + Paleo)

Since this Quarantine began, you almost can’t scroll through instagram without coming across a Banana Bread post! It’s what inspired me to create this healthy twist on the classic banana bread. As a mom to a wild and energetic toddler I sure do love my c o f f e e! What could be better, combining the two! Coffee Crumb Cake + Banana Bread.

That’s where this amazing recipe came about. I searched the web for some inspiration and combined a few recipes to come up with this one. It was a hands down winner in our house. My husband was utterly shocked that it didn’t contain any butter or white sugar!

For those who had responded to my pole, I didn’t forget about you! Next on my baking list are banana cookies! Those of you who preferred the not so healthy version of this, simply swap out the coconut oil with butter and flour substitutes with white flour. Without further ado, I’ll get right to it.

Ingredients

Cake:

  • 2 cups Almond Flour (or meal)
  • 1/2 cup Tapioca Flour
  • 1/2 cup Coconut Sugar
  • 2 Large Eggs 
  • 1/3 cup melted coconut oil
  • 1 teaspoon baking powder
  • 2 teaspoons cinnamon
  • 1 cup mashed banana (about 2-3 bananas) 

Crumb Topping:

  • 2 tablespoons melted coconut oil
  • 1/2 cup + 2 tablespoon almond flour
  • 2 tablespoons of coconut sugar 
  • 1 teaspoon cinnamon 

Prep Time: 15 minutes

Cook Time: 30-35 minutes

Serving Size: 12 pieces (sliced L 4 x W 3)

Directions

  1. Preheat oven to 350 F
  2. In an 8×8 baking dish line with parchment paper or grease with coconut oil. 
  3. In a large bowl or mixer, whisk together oil, sugar, eggs and mashed banana.
  4. In a separate bowl mix the dry ingredients (flour, baking powder and cinnamon).
  5. Slowly mix in the dry ingredients until combined well.
  6. Add to baking dish.
  7. Mix crumb topping in small bowl. Should form a crumbly mixture.
  8. Sprinkle on top of cake batter until covered.
  9. Bake 30-35 minutes. Use toothpick or fork to make sure it comes out clean.
  10. Slice and Enjoy! (Optional- I added some powdered sugar on-top, that part is not Paleo).

Note: As mentioned, you may supplement the coconut oil with butter, flour with white flour and sugar with white sugar if you want the classic coffee crumb cake. I have not tried it this way, so I can’t vouch for it, but I’m sure it would be tasty as well.

Recipes

Spicy & Dirty Margarita

May 7, 2020

Feliz Siete De Mayo mis amigos y amigas! Translation, Happy May 7th my friends. Fun fact, I speak fluent Spanish in a very American accent. Who knows what day it is anyways? It’s never too late for a tasty tequila recipe.

I sent my lovely, partially willing, mostly convinced husband out to grab me some tequila the evening of Cinco De Mayo. I was determined to celebrate in my own little way with this mixed drink. As you can see I was short the key spicy ingredient a.k.a jalapeño. However, I made do just as you can if you don’t have all the ingredients below!

Before I dive into this delicious drink, you know me… I have to share the awesome health benefits of this alcoholic beverage.

Health Benefits:

  • #1 Healthiest alcohol right above red wine.
  • Agavins, the natural sugar found in tequila are non-digestible. They act like fiber, therefore do not raise blood sugar levels.
  • Lower cholesterol.
  • In moderation, this alcoholic beverage is a great addition to a healthy & balanced lifestyle. 

Ingredients:

  • 3 tbsp or 1 shot of Tequila (I prefer Casamigos)
  • 2 tbsp orange juice
  • 3 tbsp lime juice
  • 1-2 tsp honey
  • 4-5 ice cubes

If you would like to see a video of this recipe, head to my instagram under IGTV. 

  • Instagram

Hope you enjoy this recipe as much as we did! Thank you for reading! xo- jeni deana

Beauty

DIY Sugar Body Scrub

April 22, 2020

There’s nothing more satisfying than removing dry skin, better yet leaving it feeling like a baby’s bottom! No Spa, no problem. I’ve been preparing this DIY (Do It Yourself) Sugar Scrub for years! I think I started this as far back as high school. Even with youth on our side, our skin could always use some TLC (Tender Loving Care).

Did you know Skin is the largest organ in the human body? It’s 7 layers protect and guard muscles, bones, ligaments and all those internal organs that come to mind. In order to prevent dry skin from occurring, it’s important to take the time to care for it from the inside out. Just like we try to nourish our bodies with healthy food, hydration (water) and exercise, here’s a recipe to help nourish your skin.

What causes Dry Skin anyways? With the absence of specific skin conditions, usually skin becomes dry as a result of exposure to the elements. During the winter months if you notice, your hands and cuticles become much drier. The reason for this is the air lacks humidity. To add fuel to the fire (pun intended), being indoors with forced air and heat adds to the skin’s dehydration. On the flip side, during the summer months exposure to heat and sun, can also dry out this delicate organ.

With just a few simple and natural ingredients you can find at home, here’s my “Fountain of Youth” in a mason jar. Whether your in high school, college, 30’s, 40’s, 50’s, +60’s or pregnant you will absolutely love this!

I used this throughout my pregnancy (once a week) to keep the skin around my growing belly hydrated. Gentle exfoliation can encourage skin to regenerate new skin cells and hopefully prevent stretch marks. Fun fact, I did not use ANY over the counter skin creams or lotions while I was pregnant. Benzoyl Peroxide and Salicylic acids are harmful during pregnancy. Since most face creams include these chemicals, I decided to use coconut oil for everything! I literally NEVER skipped a day applying it to my entire body (face included) especially my belly. I’m convinced it helped prevent stretch marks!

Self-tanner or Waxing plans? Add this to your prep routine 1-2 days before your wax or spray tan appointment. It helps open up the skin around the follicles, ensuring optimal hair removal. Want to properly execute that at home self tanner? This scrub removes dead skin cells, thus guaranteeing more even color.

Before I kiss you goodbye… well blow you a kiss (proper social distancing), try this scrub on those luscious lips of yours! With these natural ingredients, you can even lick them afterwards! Enjoy (just don’t eat it all).

Pour These 3 Sugars On Me:

Hope you caught my joke there a.k.a. my corny twist on some 80’s rock band lyrics. There are 3 types of sugars you can use to make this DIY Sugar Scrub. Each has their own benefits. Although sugar in the raw is a staple in our home, as that’s all we use for our beloved coffee. I do keep pure sugar cane around for this reason. I tend to incorporate pure cane sugar the most in my scrubs. It works the best for my skin type. However, I suggest that you to try the different types to see what works best for your skin type.

Types of Sugar:

1. Pure Sugar Cane:

My personal Favorite. Good for all skin types and contains some essential nutrients. Can be used 2-3x per week.

2. Brown Sugar:

This sugar is best suited for sensative skin. It is the least abrasive, for this reason it is a good choice for a face scrub. Being that it is the most gentle, it can be used up to 4x a week.

3. Turbinado Sugar (Raw):

Sugar, Sugar in the cabinet, who’s the Coarsest of them all? This sugar has the largest granules, is the least processed “raw”, and holds the most essential minerals. Scrubs made with this can be used up to 2x per week.

Types of Oils:

1. Coconut Oil:

My ultimate favorite. Besides smelling so good, it’s moisturizing, has antiviral and antibacterial properties, better yet it won’t clog your pores! I go for the Virgin & Unrefined.

2. Olive Oil:

It may not smell the greatest, but that’s nothing a little vanilla extract can’t solve! It’s the first oil I used that got me hooked to making DIY Sugar Scrubs. It deeply penetrates into skin, due to its “humectant” properties. This draws more moisture into the skin. Great for soothing dry or itchy skin and giving it that flawless glow.

Directions:

1.) Place 1 cup of sugar in container adding 1 table spoon of oil at a time and mixing in between. Usually about 3-5 TBSP depending on the sugar and oil.

2.) Scrub should have a sandy consistency (not liquidy). If there’s too much oil it may dissolve the sugar and loose it’s exfoliating properties. Add more sugar if needed or oil to get the sandy texture desired. Store in mason jar or other container with lid. 

3.) Apply to clean skin in bath or shower. Store, in cool place. Be mindful when left in the shower oils may liquefy. Just use a spoon or simply your finger to mix with sugar prior to use.

Optional: Add 1-2 tsp of Vanilla Extract or other essential oil i.e. Lavender.

Prep Time: 5 minutes or less

Expiration: Good for approx. 6 months

As always, thanks for stopping by! Hope you enjoy this as much as I do! Please leave comments below.

Love always <3 jeni deana xo

Recipes

Homemade Reese’s Peanut Butter Eggs

April 12, 2020

What’s your favorite Candy? Mine has always been Reese’s Peanut Butter Cups and Reese’s Pieces. I just love the combination of PB + Chocolate. What’s not to love?

I’ve been keeping myself busy lately by experimenting with healthy, homemade ways to satisfy my sweet tooth. That’s when I discovered this healthier alternative. Believe it or not there are more than 20 ingredients on the label of these store bought treats. My rule of thumbs is, the less ingredients the better. The more ingredients, the greater the likelihood there are preservatives and other artificial additives. If I can’t pronounce the words in the ingredients, I try to steer clear.

That’s when I discovered this recipe, which contains as few as 5-6 ingredients. Even better, they taste just like “The Real Thing“. Celebrating Easter, Passover, or simply just have a love for Reese’s? I’m pretty sure you are going to enjoy these delicious treats!

Ingredients:

  • 1/2 Cup Creamy Peanut Butter 
  • 3 Tbsp Maple Syrup
  • 6 Tbsp Tapioca Flour (or Almond Flour)
  • 1/2 cup Chocolate Chips (dark, semi-sweet or milk)
  • 1 tsp Coconut Oil
  • 1/2 tsp Pink Himalayan Salt or Sea Salt (optional)

Prep Time: 15 minutes

Freezer time: 30 minutes

Directions:

  • Mix Peanut Butter, Maple Syrup, Flour & 1/4 tsp Salt.
  • Form into egg shape.
  • Place on plate lined with parchment paper. Freeze for 20 minutes.
  • Melt Milk Chocolate and Coconut oil in the microwave 1.5 minutes (stirring every 30 seconds). 
  • Dip Eggs into chocolate, place back on plate lined with parchment paper.
  • Freeze an additional 10 minutes. 
  • Sprinkle Sea Salt on top. Serve & Enjoy!

Thanks for reading! Love hearing your feedback! Feel free to comment below.

Stay Safe!

With Lots of Love, today + always xo Jeni Deana

Recipes

No-Bake Energy Balls For My Ball of Energy

April 11, 2020

Yes, that would be my 18 month old Toddler, Nico. He is like a constant Ball of Energy bouncing from one cabinet, closet, bathroom (you name it) to another! Not sure if he needs to add this to his diet, as much as I DO in order to keep up with him! But he sure does love them!

I am reporting back with a huge thumbs up! These were not only a hit among Nico and I, but my husband as well. He had no idea I added some of these healthy ingredients he normally doesn’t like (i.e. Flaxseed and chia seed, see ingredients below).

I figured it would be easiest to share as a post, this way it’s always available for quick and easy access. It’s hard to imagine this getting any easier, but these are also No-BAKE! Yes I repeat NO-BAKE Energy Balls!!

Ingredients:

  • 1 Cup Old Fashioned Oats
  • 2/3 Cup Toasted Shredded Coconut 
  • 1/2 Cup Creamy Peanut Butter (or any nut butter).
  • 1/2 Cup Ground Flaxseed (or 1/4 Cup Flaxseed + 1 scoop pea protein or any protein powder)
  • 1 TBSP Chia Seeds (optional)
  • 1/3 Cup Honey
  • 1 TSP Maple Syrup (optional)
  • 1 TSP Vanilla Extract
  • 1/2 Cup Semi-Sweet Chocolate Chips
  • 1 TBSP Almond Milk

Directions:

  • Bake Coconut Flakes at 350 degrees F. Stir every 2 minutes until golden brown (or they can burn easily).  Total of 5-8 minutes.
  • Let cool in freezer 10-15 minutes before combining or it may melt the chocolate chips.
  • Stir all ingredients together until thoroughly combined
  • Add 1 TBSP at a time of Almond Milk (or other nut milk). Texture should  be sticky.
  • Cover and let Chill in freezer for 20 mins.   
  • Roll into 1 inch balls
  • Enjoy up to 1 week in refrigerator or freeze for up to 3 months.

  • Toasted Coconut Flakes
  • Measured Ingredients
  • Stir in Large Bowl

Thank you for stopping by! Hope you enjoy this recipe as much as my family & I do! Hit subscribe so you don’t miss a post and/or comment below! I love and appreciate all your feedback!

Stay Safe my friends!!

With Lots of Love, today + always xo Jeni Deana

Recipes

Spaghetti & Meatballs

April 4, 2020

  • Scroll down for Recipe Details

Hi there friends! Welcome, or perhaps welcome back! This is unusual for me, two posts in one week. To my surprise, I received quite a few messages asking that I share both my Roasted Honey + Balsamic Brussels Sprouts recipe and these Meatballs. By the way, I truly appreciate the feedback from you all. I genuinely enjoy sharing whatever positive information I have at my disposal, whether it be recipes or fitness related. So please, do keep them coming!

If you’re like me, you’ve probably stocked up on lots of high carbohydrate foods. For example, pasta, rice, bread and cookies. Before all of this I hardly would keep any of that stuff in my home. The absence of these items, have always omitted the temptation. I do not however want any of these items to go to waste. This week, I went for it and made Spaghetti & Meatballs. It’s okay, we all could use some comfort food every now and then during these crazy times! Everything in Balance!

Goldilocks and the Three Bears comes to mind when I think of creating the perfect meatballs. You don’t want them too hard or too soft. Just like my Brussels Sprouts, it took me a few times to get this recipe just right.

Not sure if it’s like this in your neck of the woods, but whenever we order take out from an Italian restaurant or Pizzeria they tend to give us nearly an entire loaf of Italian Bread. Usually we’re eating enough food from our take out order, we hardly eat it. Rather than letting it go to waste, I’ll throw it in a freezer safe container or ziplock bag, and pop it right in the freezer for a rainy day. If you don’t already know, the secret to getting deliciously soft meatballs is B R E A D or breadcrumbs. Meatballs is sort of a misnomer, as a good portion of the ball includes bread.

Meat on the other hand can vary. When you think of “Meat”, you may think of red meat a.k.a beef. I know that’s the first thing that comes to my mind. However, authentic Italian Meatballs actually contain 3 different types of ground meat; Beef, Veal and Pork. The Meatballs I prepared this week (photographed) only contain beef. I don’t usually have the others lying around the house, especially in times like these. Personally, I’m not a huge fan of veal. Not saying I’ve never ate meatballs with it. I have and they were delicious, but the idea of a baby calf just makes me feel badly. Quite honestly, I tend to make a modern version of Meatballs with none of these three “Meats” mentioned above. Often I’ll opt for a leaner type of meat, for example ground turkey or chicken. However, I do like to eat beef every so often as it’s a great source of Iron. Of course, if this is not your thing, this recipe can be supplemented with any meat of your choice (even vegan meat, although I not tried that before).

Being that these Meatballs contain beef, I recommend pairing it with some sort of vegetable. I made sauteed broccoli with garlic and olive oil as our side. It’s always good to have a fiber source to aid in digestion with every meal. You can also pair this with a salad. If you are opting out of spaghetti, try supplementing regular spaghetti for some zoodles (zuchini noodles) or spaghetti squash. Both are a great source of fiber for your diet.

Got M I L K? Before I dive into the recipe itself, I wanted to mention one last mystery ingredient. That’s right, it’s M I L K. This key ingredient helps to soften the bread and gives the meatballs themselves the perfect texture. I’ll get into more detail below with the Ingredients and Directions.

Ingredients:

  • 2 lbs of Ground Beef (turkey, chicken, combo of Beef, Veal & Pork or any combo)
  • 1 Onion chopped
  • 4 Garlic Cloves chopped
  • 1/4 cup of fresh parsley chopped
  • 1 teaspoon Himalayan Salt
  • Pinch of crushed red pepper
  • 4-5 cups of blended bread (breadcrumbs)
  • 1/2-1 cup of Whole Milk
  • 1/2 cup grated Parmesan cheese
  • 1 cup Pecorino Romano cheese 
  • 1 tablespoon Butter
  • Extra virgin olive oil
  • 2 large eggs

Prep Time: 40 minutes

Cook Time: 30 minutes (approx.)

Note: This is a large serving size (6-8). I was able to freeze a half for a future meal. If you want, cut ingredients in 1/2).

Directions:

  • Preheat oven to 350 degrees F.
  • Coat large pan with Butter and olive oil
  • Sautee Onion & salt 5-7 minutes (should look a bit translucent)
  • Add Garlic & crushed red pepper 1-2 mins. Turn off heat and set aside in bowl (pop them in the fridge to cool down)
  • Add frozen bread to blender until breadcrumbs form
  • In a small bowl add Milk to Breadcrumbs and squish with hands (let sit while sauteing Onion & Garlic)
  • Boil water for Spaghetti (pasta, zoodles, spaghetti squash whatever you are using)
  • Crack 2 Eggs in separate bowl and mix
  • In a large bowl combine Meat (of your choice), Eggs, Cheese, Fresh Parsley, Onion-Garlic and Breadcrumb mixture. Should be a wet sticky consistency.
  • In olive oil, brown both sides in large pan used for Onion & garlic (you can omit this step if you want them only baked).
  • Place on cookie sheet and Bake 15 minutes each side or until the meatballs are cooked all the way through (flip half way through). If using right away, add them to your big pot of sauce.

Hope you enjoyed this post! I’d love to hear your feedback. What would you like to see next? Click subscribe, so you don’t miss a post. Feel free to comment below. Thanks for stopping by =)

Stay Safe my friends!!

With Lots of Love, today + always xo Jeni Deana 

Recipes

Roasted Honey + Balsamic Brussels Sprouts

April 1, 2020

Since we began social distancing, I’ve noticed myself distancing from good habits. From a consistent workout routine, to a healthy diet. These things have always been such a focal point in my daily life. It’s hard to imagine that I’d ever feel so lost. If you’re feeling the same, I’m here to tell you, you are not alone!

It’s to easy to get off track. During times of high stress, anxiety and uncertainty, it’s only natural. Many of us resort to food to cope with these emotions. Often we retreat from good habits such as daily exercise. If you’ve felt this way, you are not alone!

I’m also here to help you get back on track! Let’s do this together! I need the motivation too! Here’s one of my favorite side dishes. It’s a healthy, delicious, fiber filled Brussels Sprout recipe.

This isn’t my first rodeo. I’ve made them for years now and it took me a while to get it right. Sometimes they had turned out too bland, too hard or too soft. Now that I’ve figured it out, I want to share with you!

These crispy, sweet and savory Roasted Honey + Balsamic Brussels Sprouts will have you sprouting with love!

Hope you enjoy! and Stay healthy & safe my friends!

With Lots of Love, today + always xo Jeni Deana 

Ingredients:

  • 1 lb Brussels Sprouts (cut in halves)
  • 1 tablespoon of honey
  • 1 tablespoons of balsamic glaze
  • 1/2 teaspoon crushed black pepper
  • 1 teaspoon Himalayan Salt
  • 1- 1 1/2 teaspoon garlic powder
  • 1/2 teaspoon rosemary
  • 1/2 teaspoon oregano
  • 2 tablespoons melted butter
  • 3 tablespoons olive oil

Prep Time: 10 minutes

Total Time: 45-50 minutes

Directions:

  • Preheat oven to 400 degrees F.
  • In a large ziplock bag (1gal) or Tupperware mix all dry seasonings.
  • Combine olive oil, melted butter, honey and balsamic glazed to bag filled with seasoning (shake).
  • Add Brussels Sprouts to bag and shake and move around for 3 minutes until completely covered.
  • If time permits let sit for 10-15 minutes.
  • Add Sprouts to baking sheet (foil lined for easy clean up)
  • If they seem dry, add more olive oil and balsamic glaze.
  • Bake for 35-40 minutes flipping over occasionally.

Health Benefits:

  • Rich in Antioxidants
  • A 1/2 cup can provide about 81% of your daily Vitamin C needs. This is great for a healthy immune system.
  • High in fiber, great for digestion.
  • Honey contains natural antibiotic.

Recipes

Perfect Poach Avocado Toast

March 6, 2020

Brunch, an opportunity to sleep in late + eat breakfast + drink bottomless Mimosas or Bloody Marys. What’s not to love? Never been much of a drinker (boring, I know), but there’s something special about the combo of breakfast food, champagne and OJ and chatting about the night before with your girlfriends, that is so refreshing on a Sunday morning!

One of my favorite Brunch choices on the menu has always been Eggs Benedict. Something about the fluffy egg, with yellow yolk running slowly onto a toasted English Muffin always makes my mouth water. My brain felt scrambled with the idea of making poached eggs myself! However, I’m here to tell you, YOU CAN DO IT!

As a new Mommy, my “Boozy Brunch” days are definitely on the back burner. Luckily, I have a front burner. It’s there I’ve learned to make my very own, what I like to call the ‘Perfect Poach Avocado Toast‘.

Here’s my healthy spin on an Eggs Benedict you can do at home in under 10 minutes. Vegan? Skip the poach and replace it with a vegetable like tomato. Gluten Free? Supplement with your favorite GF bread. Can’t get enough Bacon? Try a few slices of Turkey Bacon. Hope you enjoy this recipe as much as I do!

Side note, I’ve been thinking about testing out a Hollandaise sauce. Please leave your feedback below in the comment section if this is something you’d like to see on a future blog post =) I truly appreciate any and all feedback <3

Ingredients

1 Whole Wheat English Muffin
(toasted)
½ Avocado
1 Slice of Lemon
1 Tsp EVO- Extra Virgin Olive Oil
2 Poached Eggs
2 Spins per toast of Himalayan Salt
Sprinkle of Crushed Red Pepper

Directions

1. Fill sauce pan with 2/3, on HIGH heat. Bring to steady boil.

2. Toast English Muffin to your liking.

3. Crack egg with yolk into a Mesh Stainless Steel Ladle Spoon. Catch excess in a paper towel or plate. If you do not have this tool, crack egg in a very small bowl or cup (preferably 3-4 inches in diameter).

4. Gently place egg one at a time into boiling water.

5. Immediately reduce heat to LOW or SIMMER. Cover and set timer for 3 minutes.

6. Scoop out avocado and spread on toasted English Muffin. Squeeze lemon on top. Drizzle tsp of EVO.

7. Remove your Perfect Poach with a slotted spoon. Place on Avocado Toast.

8. Sprinkle toppings, Crushed Red Pepper and Himalayan Salt. Sip on your Mimosa, OJ or coffee + Enjoy!

Video demo is up on my Instagram (IGTV- @jenifromtheblog_)

Health Benefits

<3 Eggs are a great source of protein
<3 Avocados contain more potassium than bananas + heart healthy fatty acids (the ‘good fat’) + fiber great for digestion.
<3 EVO, high in Omega-3 fatty acids
<3 Himalayan Salt is a great alternative to table salt. Did you know table salt is bleached white? Himalayan salt contains approximately 84 minerals one of which includes iron which gives it, its beautiful pink color.

Next Page »
About Me

Hi, I'm Jeni <3

I'm a Fitness, Food + Fashion Loving Momma. I love to share healthy easy to prepare recipes, work outs and everything in between. My mission is to inspire YOU to live your best life, as the best version of yourself!

Recent Posts

  • Almond Flour Banana Muffins
  • Let’s Kiss & Make-up This Summer
  • Spicy & Dirty Margarita
  • This C O F F E E Crumb Cake is Bananas!
  • DIY Sugar Body Scrub

Recent Comments

  • jenifromtheblog on Perfect Poach Avocado Toast
  • jenifromtheblog on I Love you Berry Much Even Though You Make Me Nuts
  • jenifromtheblog on I Love you Berry Much Even Though You Make Me Nuts
  • CBD for sale on I Love you Berry Much Even Though You Make Me Nuts
  • cbd anxiety on I Love you Berry Much Even Though You Make Me Nuts

Follow My Instagram

Follow on Instagram
2023 Jeni From The Blog. All Rights Reserved. Design by SkyandStars.co
Back Top